Creating an Effective Cleaning Schedule Template
Maintaining a clean and organized home or workspace contributes significantly to our well-being. A clean environment reduces stress, promotes productivity, and improves overall health. However, keeping things tidy can often feel overwhelming without a structured approach. That’s where a well-designed cleaning schedule template comes in handy. This guide will help you create a template that suits your needs and ensures a consistently clean space.
Why Use a Cleaning Schedule Template?
Before diving into creating a template, let’s understand the benefits:
- Reduces Overwhelm: Breaking down cleaning tasks into manageable chunks prevents the feeling of being overwhelmed by a huge mess.
- Ensures Consistency: A schedule ensures that cleaning tasks are performed regularly, preventing dirt and grime from accumulating.
- Saves Time: By scheduling specific tasks for specific times, you’re less likely to procrastinate and more likely to complete them efficiently.
- Distributes Workload: For shared living spaces, a template can clearly assign tasks to different individuals, promoting fairness and accountability.
- Identifies Problem Areas: Regular use can highlight areas that require more frequent attention, allowing you to adapt your cleaning routine.
Designing Your Cleaning Schedule Template
The key to an effective cleaning schedule is personalization. Here’s a step-by-step guide to crafting a template tailored to your specific needs:
1. Assess Your Space and Needs
Begin by taking a comprehensive inventory of the areas that require regular cleaning. Consider the size of your home or workspace, the number of occupants, and the level of activity in each area. Identify specific areas that tend to get dirty quickly, such as kitchens and bathrooms.
2. Categorize Cleaning Tasks
Group cleaning tasks based on frequency: daily, weekly, monthly, and occasionally (seasonal or less frequent). Here are some examples:
- Daily: Making beds, wiping kitchen counters, sweeping floors, taking out the trash.
- Weekly: Cleaning bathrooms, vacuuming carpets, mopping floors, dusting furniture, laundry.
- Monthly: Cleaning appliances (microwave, oven), washing curtains, cleaning light fixtures.
- Occasionally: Deep cleaning carpets, cleaning windows, organizing closets, decluttering.
3. Choose a Template Format
Select a format that suits your preference and organizational style. Several options are available:
- Spreadsheet (Excel, Google Sheets): Offers flexibility for customization and easy tracking. You can create columns for tasks, frequency, assigned person (if applicable), and completion status.
- Digital Calendar (Google Calendar, Outlook): Allows you to schedule cleaning tasks as appointments with reminders, ensuring you don’t forget.
- Printable Checklist: Simple and visually appealing, ideal for posting in a visible location.
- Mobile App: Several cleaning schedule apps are available with features like task assignment, progress tracking, and notifications.
4. Define Specific Tasks and Frequency
Once you’ve chosen a format, start listing each cleaning task with its corresponding frequency. Be as specific as possible to avoid ambiguity. For example, instead of “Clean bathroom,” specify “Clean toilet, sink, shower, and mirror.”
5. Allocate Time and Assign Responsibilities
Estimate the time required for each task. This will help you allocate sufficient time in your schedule. If sharing the space with others, clearly assign responsibilities to ensure everyone contributes fairly. Discuss and agree on the assigned tasks to avoid conflicts.
6. Build in Flexibility
Life happens! Allow for some flexibility in your schedule to accommodate unexpected events. Don’t be afraid to adjust the schedule as needed. Consider designating a “catch-up” day to address any missed tasks.
7. Implement and Track Progress
Once your template is complete, put it into practice. Regularly review the schedule and track your progress. If you’re using a digital format, utilize features like checkboxes or progress bars. For printed checklists, use a pen or highlighter to mark completed tasks.
8. Review and Adjust Regularly
A cleaning schedule isn’t set in stone. As your needs change, so should your template. Review your schedule monthly or quarterly to identify areas for improvement. Are some tasks taking longer than expected? Are certain areas being neglected? Adjust the frequency or task allocation accordingly.
Example Cleaning Schedule Template (Weekly)
Here’s a sample weekly cleaning schedule suitable for a small apartment:
| Day | Task | Assigned To | Time Allotment |
|---|---|---|---|
| Monday | Laundry (1 load) | [Your Name] | 1 hour |
| Tuesday | Clean Bathroom (toilet, sink, shower) | [Your Name] | 30 minutes |
| Wednesday | Vacuum all floors | [Your Name] | 45 minutes |
| Thursday | Dust furniture and surfaces | [Your Name] | 30 minutes |
| Friday | Mop Kitchen and Bathroom floors | [Your Name] | 30 minutes |
| Saturday | Change Bed Linens | [Your Name] | 15 minutes |
| Sunday | Free Day/Catch-up | N/A | As needed |
Conclusion
Creating and consistently following a cleaning schedule template is a proactive step towards maintaining a clean and organized environment. By assessing your needs, categorizing tasks, choosing a suitable format, and regularly reviewing your schedule, you can create a system that works for you and promotes a healthier, happier living or working space. Remember to be patient and flexible; finding the perfect cleaning routine takes time and experimentation.
 735×952 cleaning schedule printable cleaning checklist savor savvy from savorandsavvy.com
  1290×1920 restroom cleaning schedule printables printablee from www.printablee.com
  640×1136 pin linda foltz bell writing drawing cleaning schedule from www.pinterest.com
  1572×1743 restaurant cleaning schedule template sample restaurant template from www.pinterest.com
  950×1345 cleaning schedule template sun printable templateroller from www.templateroller.com
  3300×2550 house cleaning schedule template from wordtemplate.net
  800×1350 printable house cleaning schedule template strength essence from strengthessence.com
  1100×850 complete housekeeping printable set cleaning schedule printable from www.pinterest.com
  2420×2560 cleaning schedule templates daily weekly monthly from templatearchive.com
  680×912 cleaning schedule templates xls from www.template.net
 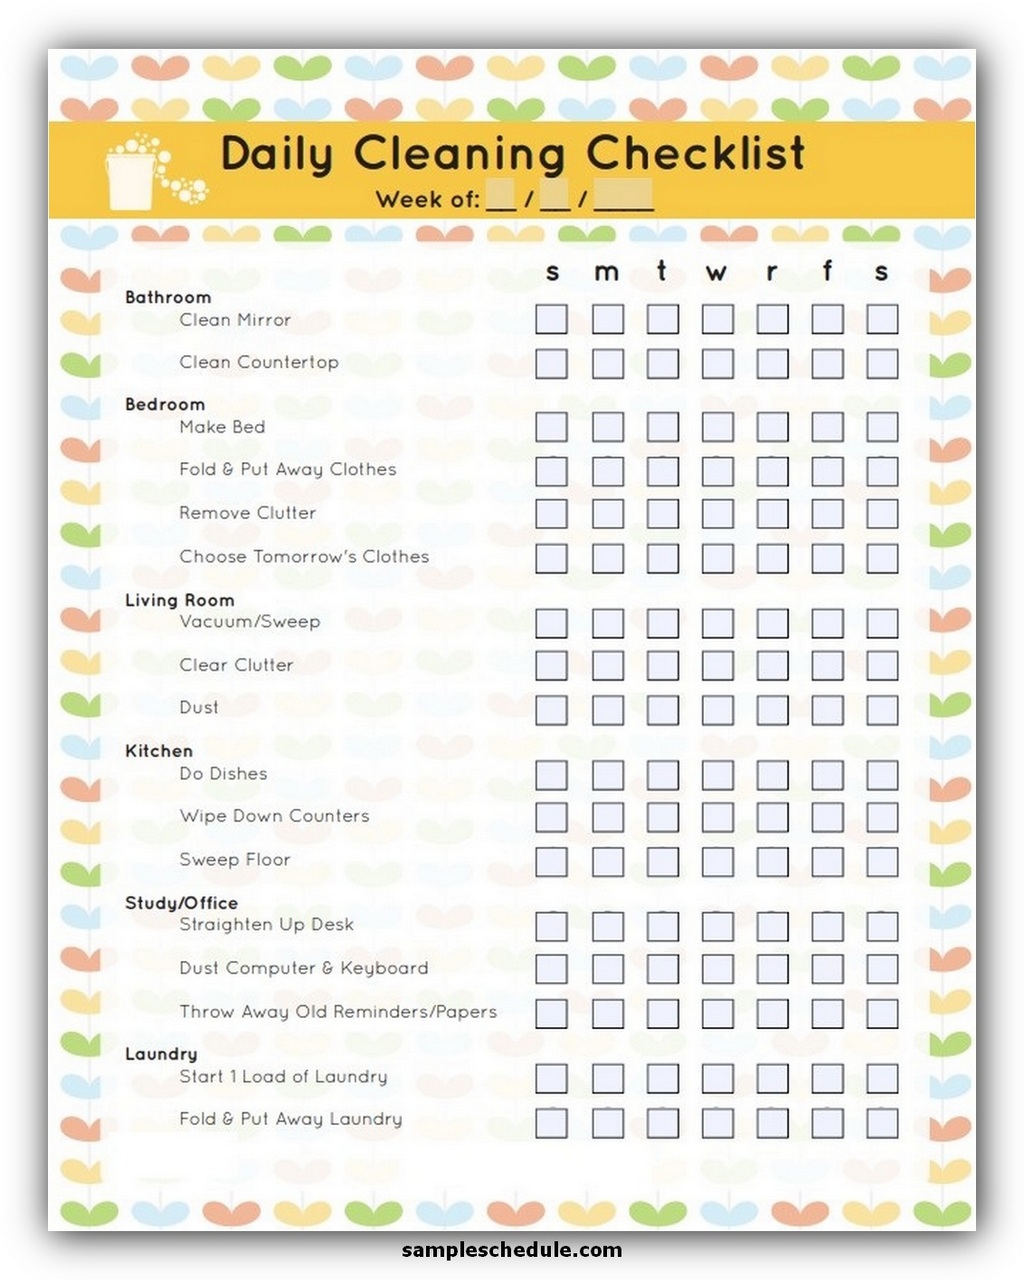 1024×1280 cleaning schedule template sample schedule from www.sampleschedule.com
  474×613 google image result httpstemplatelabcomwp contentuploads from www.pinterest.es


Tidak ada komentar:
Posting Komentar